데이터베이스 연동을 위해 @nestjs/typeorm 패키지를 설치한다.
(mysql2 인것은 promise를 지원하기 때문이라고 한다. 그냥 mysql은 promise-mysql을 따로 설치해야한다고 한다.)
npm install --save @nestjs/typeorm typeorm mysql2
.env 파일에 DB 관련 정보를 입력하고 AppModule에 TypeOrmModule을 import 해준다.
// app.module.ts
import { Module } from '@nestjs/common';
import { AppController } from './app.controller';
import { AppService } from './app.service';
import { UserModule } from './user/user.module';
import { TestModule } from './test/test.module';
import { ConfigModule } from '@nestjs/config';
import { TypeOrmModule } from '@nestjs/typeorm';
import { ConfigurationModule } from './config/config.module';

@Module({
  imports: [
    UserModule,
    TestModule,
    ConfigurationModule,
    TypeOrmModule.forRoot({
      entities: ['dist/**/**.entity{.ts,.js}'],
      type: 'mariadb',
      host: process.env.DB_HOST,
      port: parseInt(process.env.DB_PORT),
      username: process.env.DB_USERNAME,
      password: process.env.DB_PASSWORD,
      database: process.env.DB_DATABASE,
      synchronize: true,
      logging: true,
    }),
  ],
  controllers: [AppController],
  providers: [AppService],
})
export class AppModule {}
// config.module.ts
import { Module } from '@nestjs/common';
import { ConfigModule } from '@nestjs/config';
import * as Joi from 'joi';

@Module({
  imports: [
    ConfigModule.forRoot({
      isGlobal: true,
      envFilePath: '.env',
      validationSchema: Joi.object({
        DB_HOST: Joi.string().required(),
        DB_PORT: Joi.string().required(),
        DB_USERNAME: Joi.string().required(),
        DB_PASSWORD: Joi.string().required(),
        DB_DATABASE: Joi.string().required(),
      }),
    }),
  ],
})
export class ConfigurationModule {}
Entity?
Entity is a class that maps to a database table (or collection when using MongoDB). You can create an entity by defining a new class and mark it with
즉, 데이터베이스 테이블에 매핑되는 클래스이다. 엔티티를 만들면 데이터베이스에 자동으로 클래스에 일치하게 테이블이 생성된다.
synchronize
Setting synchronize: true shouldn't be user in production. otherwise you can lose production data.
이 옵션을 true로 둔다면 자동으로 테이블을 엔티티와 동기화해주기 때문에 테이블을 날리고 다시 만든다.
user.entity.ts 라는 폴더를 만들어 @Entity() 데코레이터를 가지는 User 클래스를 만든다. User 테이블에 들어갈 컬럼들을 정의한다.
Primary Column을 정해주지 않으면 해당 오류가 나온다.
[Nest] 1824 - 2023. 02. 15. 오후 10:34:38 ERROR [ExceptionHandler] Entity "User" does not have a primary column. Primary column is required to have in all your entities. Use @PrimaryColumn decorator to add a primary column to your entity.
// user.entity.ts
import { Column, Entity, PrimaryColumn } from "typeorm";

@Entity()
export class User {
  @PrimaryColumn()
  id: number;

  @Column()
  firstName: string;

  @Column()
  lastName: string;

  @Column({ default: true })
  isActive: boolean;
}

생성한 entity를 사용하기 위해 모듈에 forFeature()를 사용하여 import 해준다.
// user.module.ts
import { Module } from '@nestjs/common';
import { TypeOrmModule } from '@nestjs/typeorm';
import { UserController } from './user.controller';
import { User } from './user.entity';
import { UserService } from './user.service';

@Module({
  imports: [TypeOrmModule.forFeature([User])],
  controllers: [UserController],
  providers: [UserService],
  exports: [UserService],
})
export class UserModule {}
nestjs에서 제공하는 repository 패턴을 이용해 쉽게 CRUD를 구현할 수 있다.
서비스단의 생성자 부분에서 @InjectRepository() 데코레이터를 이용해 의존성 주입을 해줘야한다.
앞의 forFeature()로 넣어준 Entity의 속성으로 주입을 해준다.
// user.service.ts
import { Injectable } from '@nestjs/common';
import { InjectRepository } from '@nestjs/typeorm';
import { Repository } from 'typeorm';
import { User } from './user.entity';

@Injectable()
export class UserService {
  constructor(
    @InjectRepository(User)
    private readonly repository: Repository<User>,
  ) {}

  async create(name: string, age: number) {
    const user = this.repository.create({
      name,
      age,
    });
    return this.repository.save(user);
  }

  findAll(): Promise<User[]> {
    return this.repository.find();
  }

  findOne(id: number): Promise<User> {
    return this.repository.findOneBy({ id });
  }

  getHelloUser(name: string): string {
    return `hello ${name}~`;
  }
}
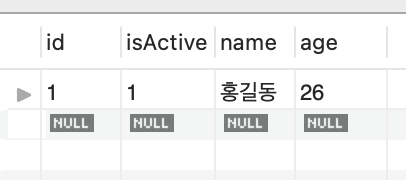
repository.save()를 사용해 DB 에 insert 해준다.
.create()는 단순히 DB에 들어갈 데이터를 만들어 주는 기능을 해준다.
컨트롤러에 Post로 경로를 하나 만들어 주고 api를 호출 한다.
// user.controller.ts
@Post()
create(@Body() userDto: UserDto): Promise<User> {
  console.log(userDto);
  return this.userService.create(userDto.name, userDto.age);
}


만약 이런 Incorrect string value: '\xED\x99\x8D\xEA\xB8\xB8...' 오류가 나온다면 해당 테이블의 charset 을 재설정 해주면 된다.
alter table User convert to character set utf8;

'dev > nestjs' 카테고리의 다른 글
| nestjs 프로젝트 생성 시 오류 (Failed to execute command: npm install --silent) (0) | 2023.11.01 |
|---|---|
| FileFieldsInterceptor (0) | 2023.03.16 |
| 인터셉터 (0) | 2023.02.14 |
| HTTP module (0) | 2023.02.13 |
| 환경 변수 (0) | 2023.02.12 |

